
The intention of this more hands-on short guide to GSAP web animation is to get you on your feet quickly, so you can already implement a nice animation at the end of your work day. Or you can just have fun with it like the writer of this article.
GSAP or The Greensock Animation Platform is a lightweight JavaScript library for creating web animations. It’s a powerful way to include motion graphics into your website or a landing page, but the basics of it are very simple, and even half an hour worth of reading about it goes a long way. GSAP is very often the secret sauce behind many of the great animation websites that you can find online.
The possibilities are vast for an experienced front-end developer, and the only thing holding you back is your imagination and the time which you can dedicate to this valuable skill.
Now, let’s animate some kittens!
The Basics
We can include the GSAP into our project via CDN or simply try it on Codepen and just include it in the pen settings like so:

Animations in GSAP consist of Tweens and Timelines. If you are familiar with any kind of video editing software such as Adobe Premiere, DaVinci Resolve or similar, this will feel quite natural as it is a similar concept.
Tween
Tween is the basic moving part of your animation. You can think of it as a “shot” (remember that video software reference?), which is going to be placed at a certain point in your Timeline, and triggered at a certain time and at a certain speed.
The most common methods you’re going to be using inside a tween are .to(), .from(), and .fromTo(). Inside these we set the selectors for the DOM elements which we want to animate, and the animation properties such as delay, duration, easing, position, opacity and similar. Refer to the GreenSock Docs for the full list.
In this example we are using the .to() method to do the following:
- Select the element by ID (this could also be a class, tag, variable...)
- Set the animation duration to 1 second
- Move the element by 500px along the X axis
- Rotate the element by 360 degrees
- Set the animation repeat to 5 times
- Apply the easing of choice
For the easier understanding of GSAP’s many easing options, refer to the Ease Visualizer in the official docs.
See the Pen Basic Tween by JS (@jscpn)on CodePen.
As you may expect, .from() does the opposite. Feel free to play around with the properties inside the pen and see how it changes.
FromTo()
A fromTo() gives us the option to set the start and end values for our animation in the separate objects. We will combine this with the stagger property. Stagger is very useful when we want to affect multiple elements, as we will do with the img tags placed inside the flex container in our example.
Let’s break our fromTo() animation step by step:
- Our two objects now share 3 properties: y-axis, opacity and scale
- In the first object, we are going from y: 100, full opacity, and 10% scale to y: 0, no opacity, and full scale in the second object
- In the second object we are adding stagger of .2s to each of our img tags, and apply Bounce easing
As a result, we have a very smooth animation of multiple elements in only 14 lines of code.
See the Pen Staggered animation / fromTo by JS (@jscpn)on CodePen.
Timeline
With timeline we can chain multiple animations into a single sequence, and even do more complex behaviors while combining multiple timelines afterwards. If we later wanted to change duration or any other properties, it would be very difficult to go through for example 30 separate from() and to() methods just to alter the animation a little bit. This would get messy very quickly. Luckily, the timelines are very easy to use and come with a lot of helper methods.
***
Here we will be doing a logo animation with the Netgen company logo, while combining a few simple rules into two custom timelines. Timelines will be executed one after the another. As all the animation examples in this article this animation will start on the button click as well, but you could of course set it up to occur on the page load, scroll, as a callback after some API response comes back, or however else you may need it.
We create a new timeline by assigning it to a variable. The usual convention is to name the variable with “tl”, like so:
const tl = new TimelineLite();
We will name our timelines “tl” and “tlDot”, and then chain a few methods to both. With some duration and timing adjustments, we can get a very realistic bounce effect for the letters and the “dot”. Notice also how we have used the “path” selector for each letter from our SVG graphic, and then applied the stagger property to it. The dot is, however, created via HTML and CSS in this case.
See the Pen Netgen Logo Animation / Timeline by JS (@jscpn)on CodePen.
* Hint: You can save some time by bookmarking this cheatsheet. *
Plugins
Plugins extend GSAP possibilities even further. We won’t dive too deep into the plugin world of GSAP, but we will shortly cover one of the most popular ones, ScrollTrigger. For the complete list of plugins you can always refer to the official DOCS.
ScrollTrigger
With the ScrollTrigger plugin we can easily create an effective scroll animation for our website. Let’s say we want to introduce a landing page animation, which occurs after the user has scrolled to a certain point. You could use another plugin for this, such as ScrollMagic (which works great with GSAP), but an even easier and better way is to just use the ScrollTrigger plugin straight from Greensock, as it is already completely integrated with GSAP.
First we need to include the plugin, like so:
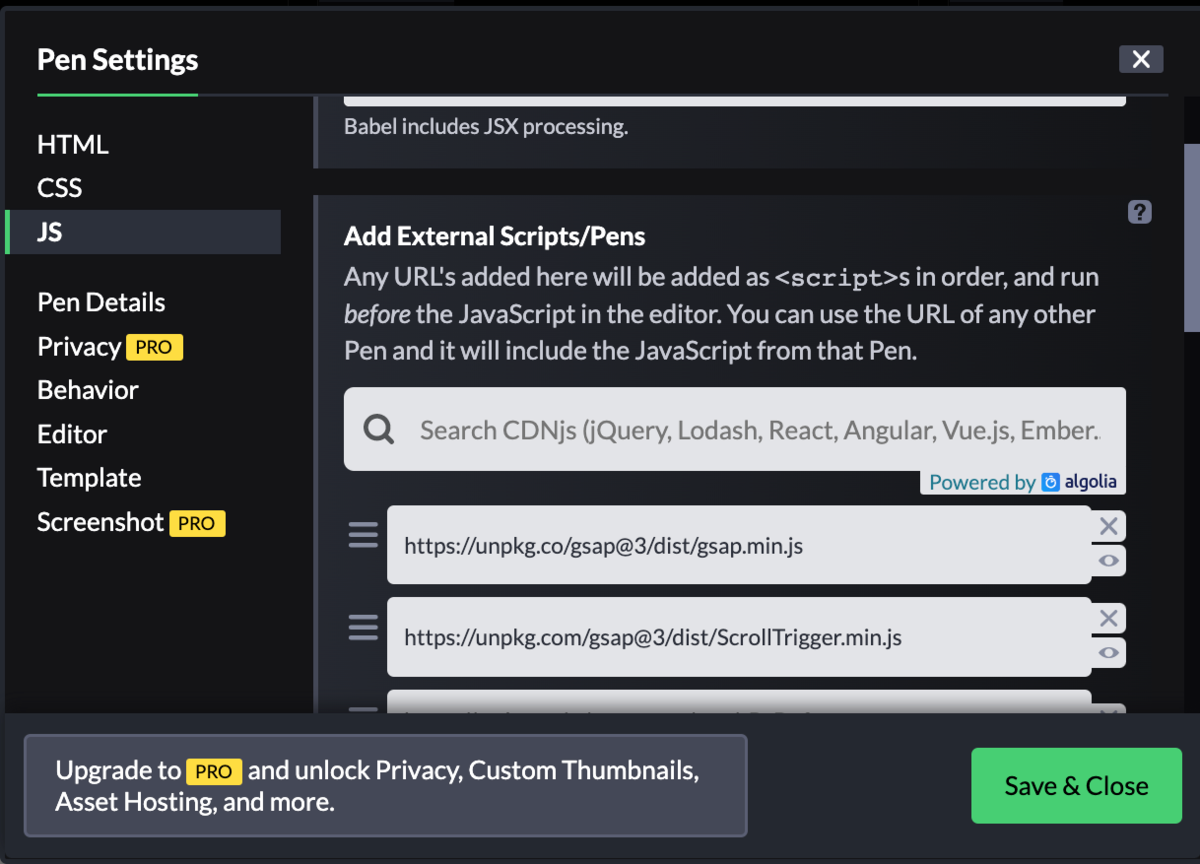
And then we will register it with: gsap.registerPlugin(ScrollTrigger);
We will use our boomerang image as the trigger point, and apply some familiar transformation properties to create a sort of a flying boomerang effect, which appears as we scroll in and out of the trigger area. The “scrub” property links the trigger area directly to the scrollbar.
See the Pen ScrollTrigger by JS (@jscpn)on CodePen.
For the full list of options check out this page.
Advanced examples
Here are some cool examples I have found online to tickle your imagination.
https://codepen.io/cassie-codes/pen/gOYvGWJ
https://codepen.io/hailedev/pen/zYrJrbj
https://codepen.io/ste-vg/pen/GRooLza
As you can see, web animation can be quite fun, and GSAP makes it really easy to start with. And what about you, are you going to try it in your next project?
If so, hopefully you will find this short guide useful.